By Claire Foster
Updated November 2026
Santa Cruz Chameleon bikepacking is a practical way to turn a capable trail bike into a multi-day touring machine. In this guide, you will learn how to set up the bike’s cockpit and frame space, distribute weight so the handling stays predictable, and plan a trip that suits the bike’s strengths. The Chameleon is a flexible platform, so the right setup depends on the terrain you plan to ride and how much gear you need to carry.
Understanding What the Chameleon Brings to Bikepacking
The Chameleon is best known as a trail-oriented bike with a relatively short rear end and a progressive geometry that rewards active riding. Those traits make it fun on singletrack and fire roads alike, but they also mean you should think carefully about how you load it. Compared with a dedicated touring bike, you have less room for bulky panniers and a longer wheelbase to absorb weight, so bikepacking-style soft luggage is usually the better fit.
Before you buy any bags, measure your frame. Note the usable triangle space, the distance between the seat tube and the rear wheel, and the clearance between the tires and the chainstays. Manufacturers specify tire clearance and maximum tire widths for each frame size, and you should stay well inside those limits when you add mud or snow conditions to the mix.
Step 1: Plan the Route and Gear Load First
Good setups start with a route. A three-day loop with 3,000 feet of climbing per day calls for a different load than a single overnight with mostly flat terrain. Write down the expected daily distance, the total elevation gain, the number of resupply points and the highest and lowest temperatures you expect to face. These numbers will tell you how much food and water you need to carry and how much room to reserve for shelter and sleep gear.
If you are new to multi-day riding, it helps to review the broader categories of touring first. The article Types of Bike Touring: Credit Card to Bikepacking explains how different styles of trips change the gear you need, and Bikepacking Camping Gear: Shelter, Sleep and Kitchen covers the core items most riders bring.
Step 2: Choose and Fit Your Bags
Most Chameleon riders split their load across three zones: a handlebar roll, a frame bag and a seat pack, with a small top tube or stem bag for snacks and tools. Each zone has a job, and each should be sized to the frame you actually own.
Frame Bag Fit
Frame bags are the most valuable storage on a bikepacking setup because they keep weight low and central. Measure the triangle at its widest and tallest points, then subtract about half an inch of clearance so the bag does not rub when you stand up out of the saddle or when the frame flexes. Leave room for your water bottle cages, and check that the bag will not interfere with your knees or shifter cables.
Seat Pack and Dropper Post Clearance
If your Chameleon has a dropper post, the seat pack must clear the post’s full travel. Lower the dropper completely, then mount an empty bag and check that it does not touch the seat clamp or the post when you raise and lower it. Many riders use a seat pack with a dedicated dropper strap or a shorter bag to avoid this conflict.
Handlebar Roll Balance
A handlebar roll should be lightweight, since it sits high and affects steering. Keep it under about 5 to 6 pounds if you plan to ride technical terrain, and make sure it does not rest on the brake levers or hit your hands when you turn the bars fully.
Step 3: Distribute Weight for Predictable Handling
Weight placement changes how the bike feels, especially on descents and loose climbs. Place heavy items such as food, water and tools in the frame bag, which keeps the center of mass low. Place lighter bulky items like sleeping bags and clothing in the seat pack and handlebar roll. Avoid stacking all the weight at the rear, because that can cause the front wheel to wander on climbs and feel light under braking.
As a general guideline, many riders aim for a front-to-rear weight split that leaves the front wheel carrying a meaningful share of the load, so steering stays precise. Test your setup with a short ride on varied terrain before you leave.
Step 4: Dial in the Cockpit and Drivetrain
Once the bags are in place, adjust the cockpit. Check that your hands can reach the brakes and shifters without the handlebar roll interfering. Re-check brake lever reach and cable routing, since extra load can change how your body sits on the bike. If you run a dropper, test the post at full extension with the seat pack installed.
Drivetrain setup matters too. Carry a spare derailleur hanger, a quick link and a chain tool, and confirm your gear range suits the climbs on your route. A slightly lower gear than you think you need is usually the safer choice when carrying extra weight.
Trip Planning Checklist
- Confirm the route distance, elevation and resupply points on a current map or GPS file.
- Check tire pressure, sealant status and spare tubes or plugs.
- Fit and test all bags on the bike at least once before departure.
- Pack a repair kit including tire levers, a multitool, a spare chain link and a mini pump.
- Carry enough water for the longest dry section, using the flow rate of your filter or treatment method.
- Review weather forecasts and check for seasonal closures on trails and campgrounds.
- Tell someone your route and expected check-in time.
Common Mistakes
- Overloading the handlebar roll. Heavy items up front make steering vague and tiring on descents.
- Ignoring dropper clearance. A seat pack that binds on the post can stop the dropper from working.
- Skipping a test ride. A loaded bike handles differently, and problems that appear on a short ride are far easier to fix at home.
- Packing for the best-case weather. Carry one layer more than you think you need, especially for high-elevation sections.
- Underestimating daily distance. Loaded riding on rough terrain is slower than road touring, so plan shorter days.
Recommended gear
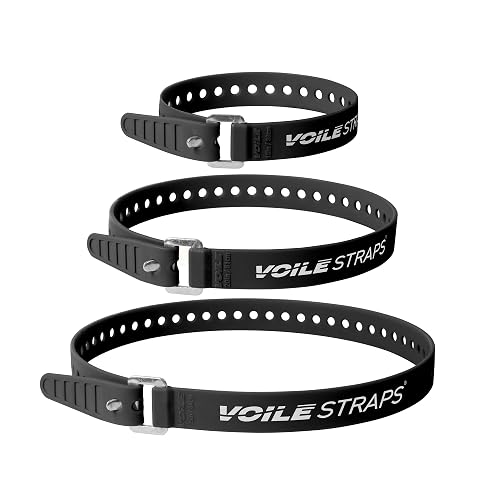
A frame bag sized to your specific Chameleon is the single most useful upgrade for this platform, since it keeps heavy items centered. Look for models sold as frame bags for mountain bikes with adjustable straps, because they tolerate small frame variations. View on Amazon
A compact dry bag works well as a seat pack liner. It keeps sleeping gear dry in rain and makes the bag easier to pack and unpack at camp. View on Amazon
A small multitool with chain tool and hex keys covers most trailside adjustments. Keep it in your top tube bag where you can reach it without unpacking. View on Amazon
A lightweight mini pump with a hose fits inside a frame bag and is useful for topping off tires after a flat. View on Amazon
Tips for a Better First Trip
Start with an overnight close to home. A short trip reveals packing mistakes without the stakes of a multi-day route far from help. Keep a written packing list, and update it after each trip so you learn which items you actually use. Ride conservatively on the first day, since fatigue and heavier handling add up faster than most new riders expect.
Check local trail rules before you go. Some areas restrict bikes on certain trails or require permits for overnight camping. The guide Mountain Bike Trails Santa Cruz CA: Top 10 Picks for Every Rider offers a starting point for riders exploring that region, and Bike Touring vs Bikepacking (2026): Which Is Better for Your Next Trip? helps you decide whether a bikepacking format suits your goals.
FAQ
Can a Santa Cruz Chameleon handle bikepacking bags?
Yes, most riders use soft bikepacking bags on the Chameleon, including frame, seat and handlebar bags. Fit each bag to your frame size and check dropper and tire clearance before you ride.
Do I need a frame bag for a Chameleon?
A frame bag is not strictly required, but it is one of the most useful additions because it keeps weight low and central. Without it, you will rely more on handlebar and seat storage, which can affect handling.
How much weight should I carry on the handlebars?
Keep handlebar loads light, generally under about 5 to 6 pounds if you ride technical terrain. Heavier loads make steering less precise and can cause fatigue on rough descents.
Will a dropper post work with a seat pack?
It can, but you must check clearance. Lower the dropper fully with the seat pack mounted and confirm the bag does not interfere with post travel or the seat clamp.
What tire setup works best for bikepacking on a Chameleon?
Choose a tire width and tread suited to your terrain, and stay within the maximum width the frame specifies. Many riders run tubeless setups for puncture resistance on loaded trips, though this depends on rim compatibility.
How far can I ride in a day with a loaded bike?
Daily distance depends on terrain, elevation and load. Loaded riding on trails is usually slower than road riding, so plan conservative days and build in time for breaks, meals and repairs.
Should I get professional help setting up my bike?
If you are unsure about frame fit, suspension setup or drivetrain adjustments, consult a qualified bike mechanic. A professional fit check can prevent rubbing, clearance problems and handling issues before you leave.
Conclusion
A well-set-up Santa Cruz Chameleon can handle multi-day bikepacking trips with confidence when the bags fit the frame, the weight is balanced and the route suits the bike. Plan your route first, test the setup on a short ride and build a checklist you refine after every outing. Start small, learn from each trip, and let the terrain guide how far you push the bike.
Ready to choose one?

About Claire Foster
Claire has been writing about bike touring & bikepacking for this site, with an eye on clear explanations, honest trade-offs and options for different needs and budgets.